

Annotating texts is something that English teachers love to do, but making this process visible to students is often considered a complex task. With appropriate willingness to experiment with existing technology, you need never have to gesture wildly at a section of a book in front of 25+ students again.
The only things you really need for the simplest form of this is a smart phone, some bulldog clips, some school chairs and a metre ruler. The bulldog clips are to keep the book open and relatively flat; the metre ruler is to provide a base for the smart phone to sit above the text and you will need some standard issue school chairs to balance the ruler and device on. The finished product looks something like this, with either a smart phone or tablet:
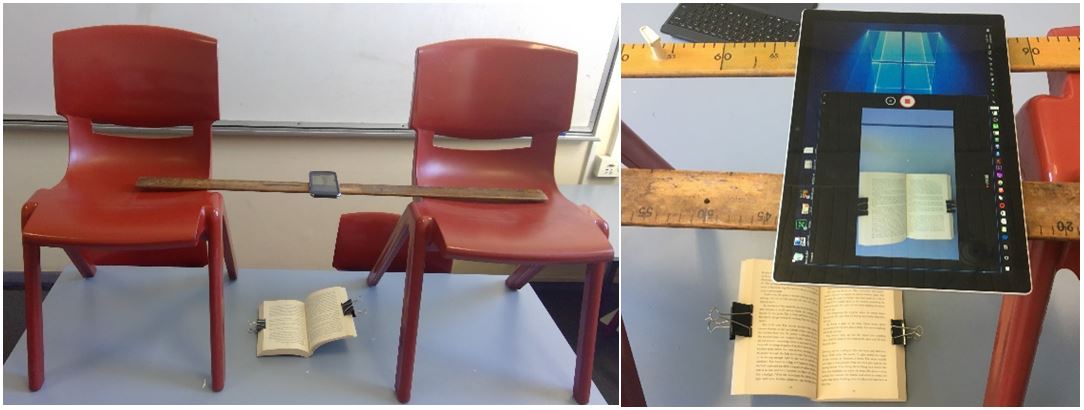
This set up works perfectly for doing annotation in-between or before classes. If you are using a device like a surface pro, or any device that can be flexibly rotated into a ‘tablet mode’, you can attach cables to your classrooms projector to have this produce live to the screen of your classroom. I use a program called ‘OBS’ (Online Broadcasting Software) that is free and open source. It is also very easy to learn and use. This will produce what is visible on your screen to the projector and also allow you to record it. This includes picking up audio of you, or your students talking others through the thought processes of annotation as they do it. Allowing students to copy the annotations and be aware of the thought processes that produced them.
If you are without a tablet-like device, the next best option is the smart phone, but this adds another layer of complexity as you have to share your screen wirelessly with the projector. For this purpose I use a software called ‘Reflector’ that costs about $11 and is available on both Android and IOS devices. It will do the same job as your projector cables and again, for this process I would also use OBS to record the screen of your laptop that will have an image of your smart phone’s view on it. Again, audio can be collected from both or either sources without difficulty.
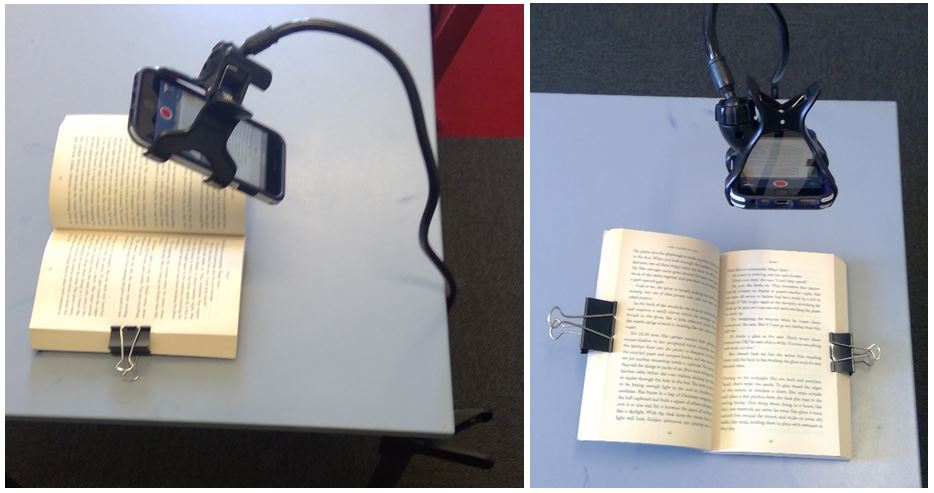
In terms of creating a hazardous-looking assemblage of chairs at the front of your room and then laying reasonably expensive devices precariously on top of it. There is a more portable and professional-looking option, that should cost under $10. This product comes to us from the lazy world of eBay, where you can buy flexible plastic clips with reticulated arms, that are originally designed so that people do not have to hold their phone or iPod, whilst on the toilet, or in bed. Searching for ‘iphone flexible holder’ will produce a range of reasonable examples. The outcome is a less stable result than the above, but produces perfectly fine output that I have used many times in the past years without issue.
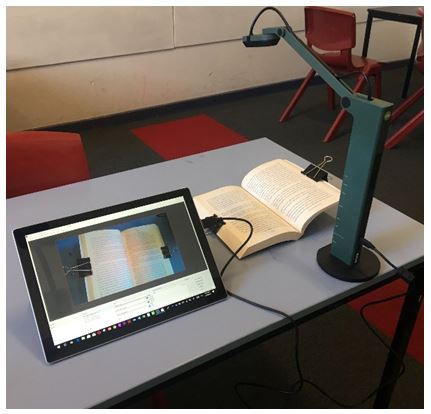
Lastly, if you have tried each of these methods and have developed a habit of using video to show students annotation, there is a fully paid option. These devices combine all of the elements above into one specifically designed piece, they have a stable, heavy base, a built in light, auto-focus features, built-in Microphones and so forth. They do start at about $100-200 dollars however, so I woudn’t recommend starting at this point, but rather moving through the makeshift forms above to see if the techniques described have pedagogical utility to you. The device pictured is an IPEVO VZ-R that has served me very well. Good luck trialling annotating semi-digitally with your students!
To register for Steven Kolber’s session at the National Education Summit, visit www.nationaleducationsummit.com.au
National Education Summit, MELBOURNE
Friday 30 August – Saturday 31 August 2019
Melbourne Convention and Exhibition Centre
Early Bird registrations available until June 30 at nationaleducationsummit.com.au.